To replace parts on your suction pool cleaner, start by inspecting components like hoses, brushes, and seals for cracks, tears, or wear. Disconnect power before removing and installing new parts, guaranteeing they fit snugly and are properly aligned. Regular maintenance, such as cleaning filters and checking for damage, helps extend lifespan. If issues persist, replacing worn parts promptly ensures your cleaner works efficiently—stick with us to learn the step-by-step process.
Key Takeaways
- Regularly inspect and identify signs of wear or damage on brushes, hoses, seals, and other components.
- Follow manufacturer instructions for removing and installing replacement parts to ensure proper fit.
- Confirm all parts are compatible with your specific pool cleaner model before installation.
- Tighten and secure all assemblies properly to prevent leaks, slipping, or reduced suction.
- Perform routine maintenance and timely replacements to maintain optimal cleaning performance and extend equipment lifespan.
Top picks for "replac part suction"
Open Amazon search results for this keyword.
As an affiliate, we earn on qualifying purchases.
Identifying Worn or Damaged Components

To keep your suction pool cleaner working effectively, you need to spot worn or damaged parts early. Regularly inspect components like the brushes, impellers, and seals for cracks, tears, or wear. Changes in pool chemistry, such as high chlorine levels or pH imbalance, can accelerate deterioration, so keep water balanced to prolong parts’ lifespan. Always follow safety precautions when handling equipment—disconnect the cleaner from power and wear gloves. Look for signs of decreased suction, unusual noises, or leaks, which can indicate damage. A worn or broken part reduces cleaning efficiency and may cause further damage if left unchecked. Identifying issues early helps you perform timely repairs, ensuring your cleaner operates smoothly and safely, saving you money and effort in the long run. Additionally, understanding the importance of Home Furnishings can help you create a comfortable environment where your pool equipment remains in optimal condition. Regular maintenance and component inspection are essential to extend the lifespan of your pool cleaner and maintain a clean pool. Recognizing common wear issues can help you address problems before they become costly repairs, and understanding retirement planning strategies can provide peace of mind for future financial stability. Staying informed about Porsche Tuning options can also inspire you to optimize your vehicle’s performance and longevity.
Replacing the Vacuum Hose or Tubing
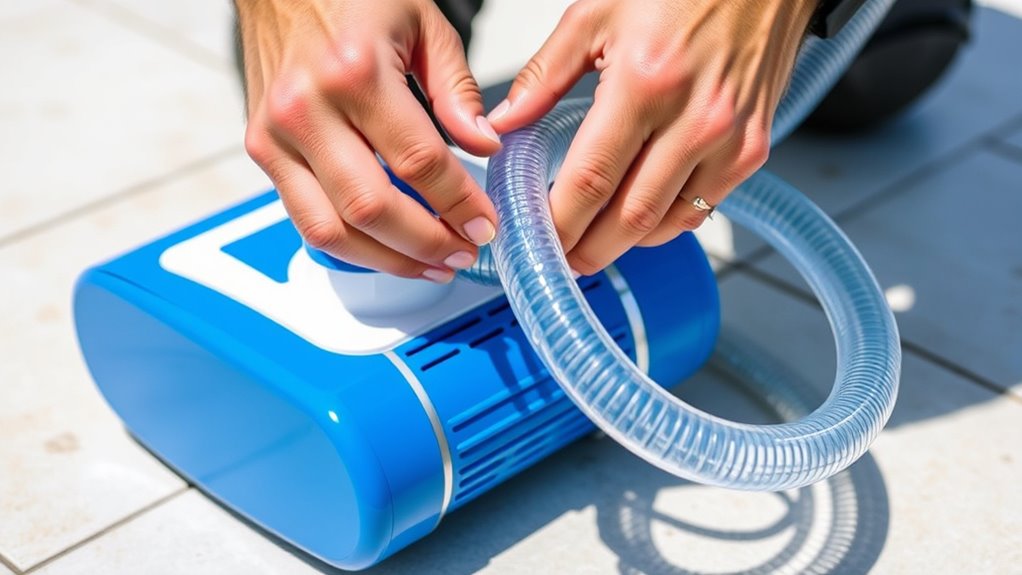
Have you noticed a decline in your pool cleaner’s performance or frequent tangling of the hose? It’s time for a thorough hose inspection. Check for cracks, holes, or signs of wear that could hinder its function. If you see significant damage or persistent tangles, tubing replacement is necessary. Start by disconnecting the old hose from the cleaner and pool skimmer. Carefully remove any tangled sections and inspect for blockages or leaks. When replacing, ensure the new tubing fits securely and is free of kinks. Proper installation is key to maximum cleaning. Regular hose inspection prevents breakdowns and maintains efficient operation. Additionally, electric power generation options like bike generators can provide sustainable energy for your pool equipment, reducing reliance on traditional power sources. Ensuring the correct fit of your replacement hose or tubing is crucial for optimal performance and preventing future issues. Replacing the vacuum hose or tubing is a straightforward fix that restores your pool cleaner’s performance and keeps your pool sparkling clean. To further enhance your pool maintenance, consider understanding the role of contrast ratio in your pool’s filtration system, which affects clarity and cleanliness.
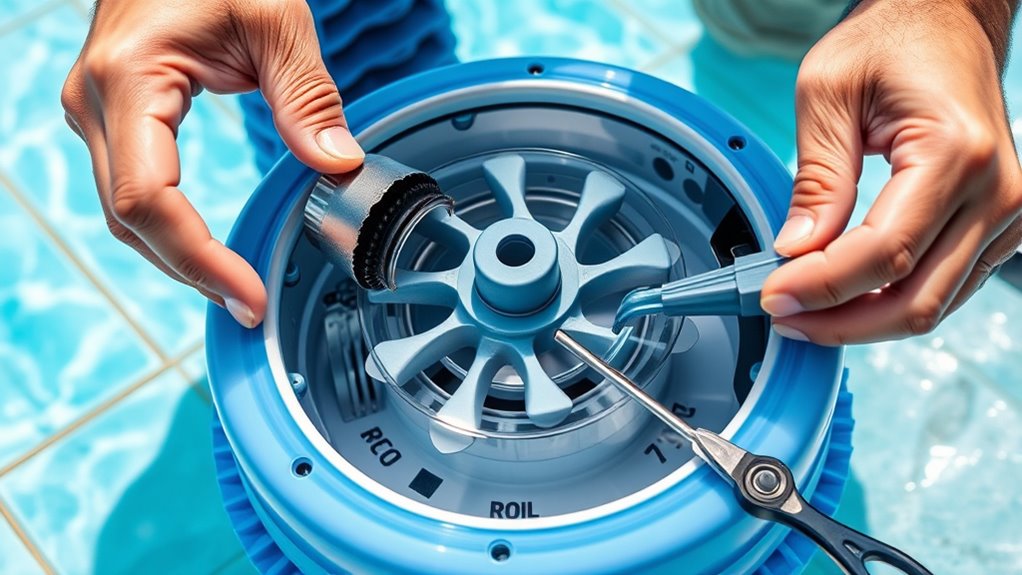
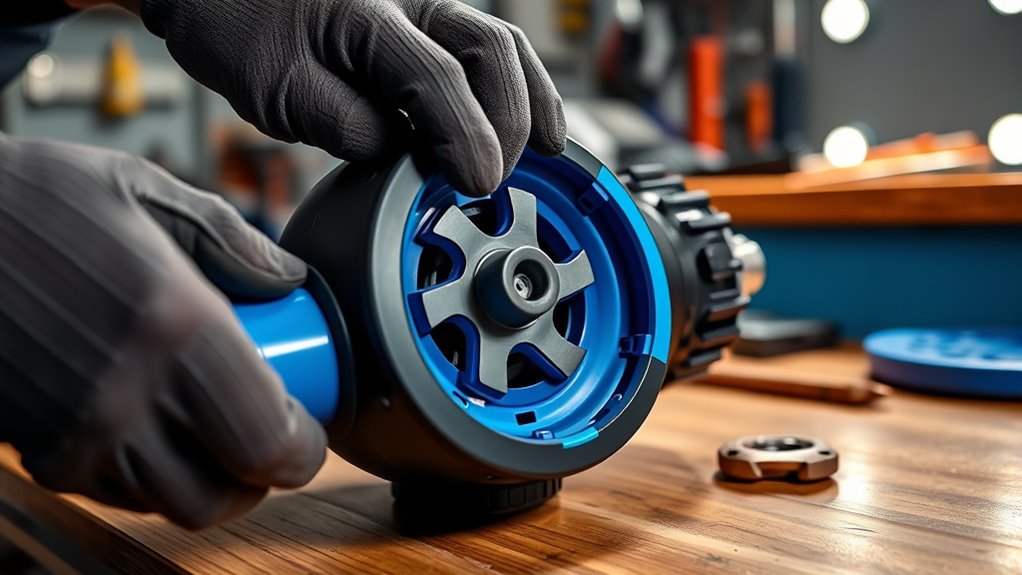
Swapping Out the Pool Cleaner’s Brush and Wheel Assemblies
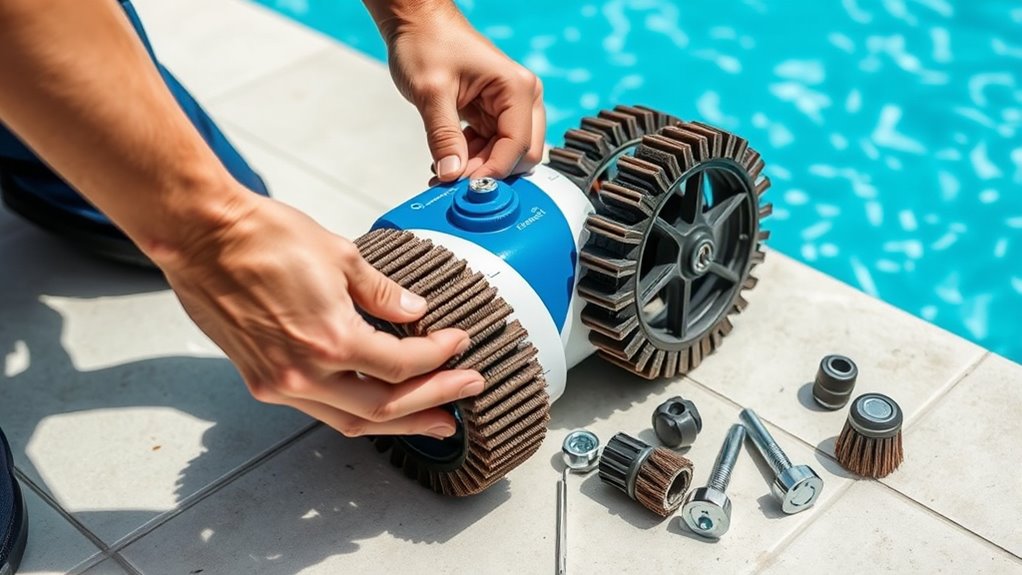
To swap out the brush and wheel assemblies, start by removing the old components carefully. Then, install the new assemblies, making sure they fit snugly and securely. Double-check that everything is properly aligned before resuming your pool cleaning. Ensuring compatibility with the pool cleaner’s parts can help maintain optimal performance and prolong the lifespan of the equipment proper maintenance practices. Regular inspection of the eye patch area can also prevent potential issues and ensure continued effectiveness of your skincare routine. Incorporating skincare routine adjustments may further enhance skin health and prevent future problems. Additionally, monitoring for signs of cheating in your routine can help identify issues early and maintain the overall health of your pool equipment.
Removing Old Components
Before installing new parts, removing the old components carefully is essential. Start by unplugging the pool cleaner and draining any water from it. Remove the debris or obstructions around the brush and wheel assemblies. Loosen and detach the screws or clips holding these parts in place, taking note of how they fit. During pool cleaning, dirt and debris can cause buildup, so inspect the assemblies for damage or wear. Making certain these parts are fully removed prevents damage to the water filtration system and keeps your cleaner functioning properly. Handle all parts gently to avoid breaking connectors or other components. Proper removal makes installing new assemblies easier and ensures your pool cleaner continues to effectively maintain water clarity and cleanliness. Additionally, inspecting the components for any signs of corrosion or damage can help prevent future malfunctions. Regular maintenance and inspection are crucial to extend the lifespan of your pool cleaner and maintain optimal performance. Incorporating preventive care strategies can further ensure long-term reliable operation.
Installing New Assemblies
Once you’ve removed the old brush and wheel assemblies, it’s time to install the new components. Carefully align the new parts, ensuring they fit snugly into their designated spots. To maximize your pool cleaner’s performance, follow these steps:
- Secure the new assemblies tightly to prevent slipping during operation
- Check for proper alignment to avoid imbalance
- Test the movement to ensure smooth rotation
- Revisit your pool maintenance schedules to include regular calibration
- Incorporate proper installation techniques into your routine to promote relaxation and reduce stress, which can improve your overall focus during maintenance tasks
Proper installation helps maintain optimal suction and cleaning efficiency. Remember, well-installed parts contribute to better pool cleaner calibration, reducing the need for frequent repairs. Take your time during installation, and always double-check connections before testing the cleaner in the water. This ensures your pool stays clean and your equipment lasts longer. Additionally, understanding airless paint sprayer features can help you troubleshoot and optimize your equipment for better performance.
Ensuring Proper Fit
Ensuring a proper fit when swapping out your pool cleaner’s brush and wheel assemblies is essential for peak performance. When installed correctly, you’ll notice better cleaning efficiency and smoother operation. Proper fit also allows for aesthetic customization, giving your cleaner a fresh look that matches your pool’s style. If you experience unusual noises or vibrations, double-check that the assemblies are securely and correctly installed. Loose or misaligned parts can cause troubleshooting issues, leading to unnecessary wear or damage. Take your time to align components properly, ensuring they snap into place without forcing. A snug fit not only enhances performance but also extends the lifespan of your parts. Always refer to the manufacturer’s instructions for specific fit guidelines to avoid common installation errors. Additionally, understanding proper fit and installation can help you maintain a harmonious partnership while performing maintenance tasks together.
Installing a New Diaphragm or Flapper Valve
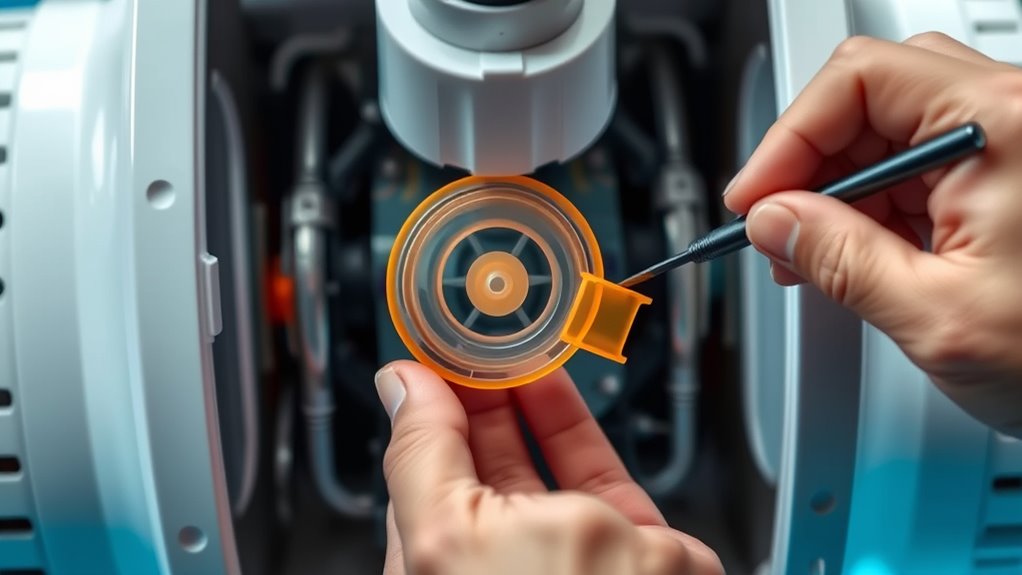
Have you ever wondered how to replace the diaphragm or flapper valve on your suction pool cleaner? Start by removing the old component carefully. When installing the new one, pay attention to the diaphragm material and flapper design to guarantee proper fit. Here are key tips:
- Check the diaphragm material for compatibility with your cleaner’s specifications
- Match the flapper design to the original for peak performance
- Ensure the new part is seated firmly without gaps
- Verify that the flap moves freely without obstruction
Replacing the Suction Inlet or Intake Port
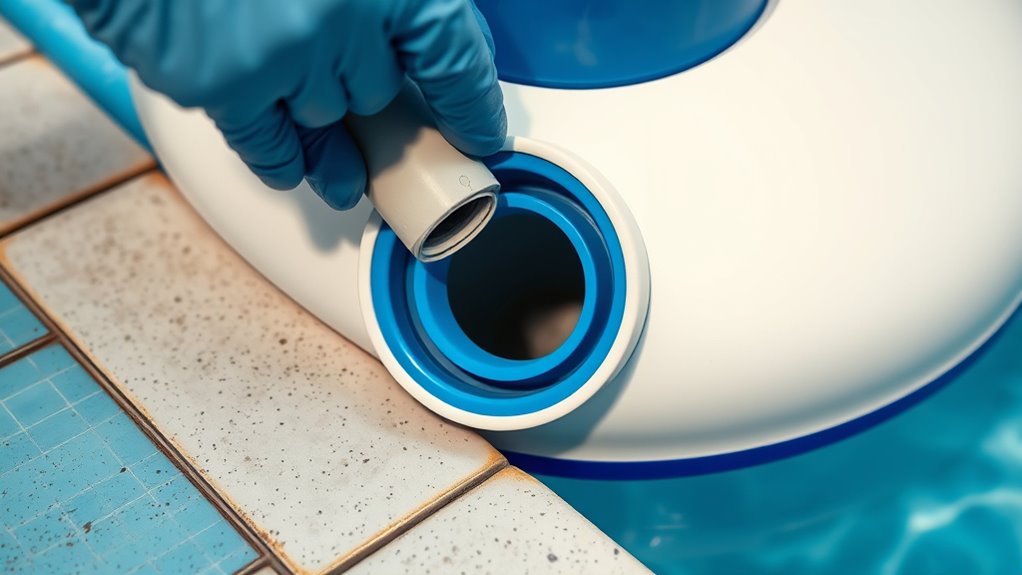
To replace the suction inlet or intake port on your pool cleaner, start by turning off the cleaner and disconnecting it from the pool’s hose. Inspect the current port for cracks or damage, which can affect suction and cleaning efficiency. Remove any debris or buildup that could interfere with removal. When replacing the part, ensure the new inlet matches your cleaner model. Properly clean the area beforehand, especially if your pool has experienced changes in water chemistry, which can cause mineral buildup or corrosion. If you’re storing the cleaner seasonally, remove and clean the inlet, then dry it thoroughly to prevent mold or corrosion during storage. Installing the new port securely guarantees optimal suction, keeping your cleaner working efficiently year-round.
Repairing or Replacing the Drive Motor or Gearbox

If your pool cleaner isn’t moving properly or seems to be struggling with debris, the drive motor or gearbox might be the culprit. You may need to contemplate drive motor repair or gearbox replacement to restore functionality. Before starting, ensure you have the right tools and replacement parts. When repairing or replacing the drive motor or gearbox, keep these tips in mind:
- Disconnect power before working on the unit
- Check for visible damage or leaks
- Test the motor with a multimeter for electrical issues
- Follow manufacturer instructions for gearbox repair or replacement
Performing these steps carefully can save you time and money. If the drive motor or gearbox shows signs of wear, replacing these components is often more cost-effective than extensive repairs.
Regular Maintenance Tips to Prolong Part Lifespan
Regular maintenance is essential for extending the lifespan of your suction pool cleaner’s parts. Keep an eye on your pool chemistry to prevent buildup that can stress components. Stick to a consistent cleaning schedule to avoid debris accumulation, which can cause unnecessary wear. Regularly inspect hoses, brushes, and filters, replacing worn parts promptly. Properly balancing pH levels minimizes corrosion and damage. Additionally, rinse parts after use to remove chemicals and debris. Use the table below as a quick reference for maintenance tips:
| Task | Frequency |
|---|---|
| Check pool chemistry | Weekly |
| Clean filters and hoses | Weekly |
| Inspect parts for wear | Bi-weekly |
| Replace worn parts | As soon as needed |
| Rinse cleaner after use | After every cleaning |
Frequently Asked Questions
How Often Should I Replace Parts on My Suction Pool Cleaner?
You should follow a regular maintenance schedule to keep your suction pool cleaner working efficiently. Check parts like brushes, filters, and hoses every few months, and replace them as needed based on their part lifespan. Typically, brushes last about 6-12 months, while filters may need replacement every 2-4 months. Staying on top of these replacements guarantees your cleaner performs well and extends its overall lifespan.
Can I Replace Parts Myself or Need a Professional?
Like a skilled sailor tending to their vessel, you can often handle DIY repairs on your suction pool cleaner. Small part replacements, such as brushes or hoses, are usually straightforward, but complex issues might need professional maintenance. If you’re comfortable with tools and instructions, go ahead; otherwise, trusting a pro guarantees safety and proper care. Know your limits, and you’ll keep your pool pristine without risking damage.
What Tools Are Required for Replacing Pool Cleaner Parts?
For replacing pool cleaner parts, you’ll need basic tools like screwdrivers, pliers, and possibly a wrench. These tools help you remove and secure parts during pool maintenance and make sure your cleaner functions efficiently. It’s a good idea to follow cleaning tips and manufacturer instructions for specific models. With the right tools and care, you can confidently handle repairs yourself, saving time and money while keeping your pool in top shape.
Are There Compatible Replacement Parts From Third-Party Manufacturers?
Oh, the thrill of hunting for compatible replacement parts! Luckily, third-party compatibility and aftermarket options exist, so you don’t have to stick with pricey brand names. You can find affordable, quality alternatives that fit your suction pool cleaner perfectly. Just remember, not all aftermarket parts are created equal—read reviews and check compatibility carefully. With a little research, you’ll keep your pool pristine without draining your wallet!
How Do I Troubleshoot if the Cleaner Stops Working After Part Replacement?
If your pool cleaner stops working after a part replacement, start troubleshooting by checking for pool cleaner leaks, which can indicate improper installation or damaged seals. Listen for motor noise issues—strange sounds might suggest motor problems or misaligned components. Confirm all parts are securely attached and correctly fitted. Test the cleaner again, and if issues persist, review the manual or consult a professional to pinpoint the problem.
Conclusion
Regularly inspecting and replacing worn parts can extend your pool cleaner’s lifespan considerably. Did you know that neglecting small repairs can reduce its efficiency by up to 30%? By staying proactive with maintenance, you not only save money on costly repairs but also ensure your cleaner keeps your pool sparkling. With just a little effort, you’ll enjoy hassle-free cleaning and a pristine pool all season long. Keep up the care, and your cleaner will serve you well for years.