
To install a suction pool cleaner, start by gathering your tools and reviewing the manufacturer’s instructions. Attach the hose securely to the pool skimmer or dedicated fitting, making sure connections are tight to prevent leaks. Connect the hose to the cleaner head, then submerge and arrange the hose in the pool, keeping it straight and free of kinks. Position the cleaner on a flat surface, turn on the pump, and check for proper operation. Adjust hose length and flow as needed—more details will guide you through each step smoothly.
Key Takeaways
- Read the manufacturer’s manual thoroughly and gather all necessary tools and equipment before starting.
- Attach the hose securely to the pool skimmer or dedicated fitting, ensuring tight fittings to prevent leaks.
- Connect the hose to the cleaner head, verifying compatibility and locking fittings into place without forcing.
- Properly position and submerge the hose in the pool, laying it flat and avoiding kinks or tangles.
- Turn on the pump, check for proper operation, and adjust hose length and flow for optimal cleaning performance.
Top picks for "install suction pool"
Open Amazon search results for this keyword.
As an affiliate, we earn on qualifying purchases.
Gather Necessary Tools and Equipment
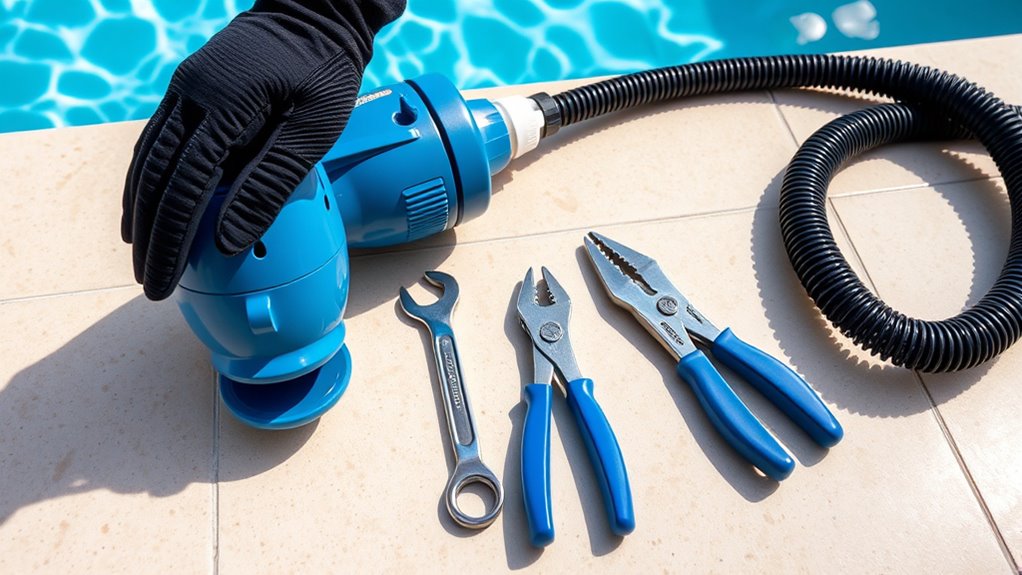
Before you begin installing your suction pool cleaner, it’s important to gather all the necessary tools and equipment. Proper preparation guarantees smooth installation and promotes effective pool maintenance. You’ll need a telescopic pole to reach all areas of your pool and connect the cleaner easily. Make sure you have the correct hoses and fittings compatible with your cleaner model, as proper connections support energy efficiency by minimizing leaks. A pair of scissors or a utility knife helps trim hoses if needed. Keep a screwdriver handy for any adjustments. Gathering these tools beforehand prevents interruptions and ensures you install the cleaner correctly. Investing in quality equipment not only makes installation easier but also improves the cleaner’s performance, ultimately saving energy and maintaining your pool’s cleanliness efficiently. Additionally, understanding pool cleaner installation best practices can help you avoid common issues and ensure your cleaner functions optimally. Being familiar with suction power requirements and settings can further optimize your cleaner’s performance and longevity.
Read the Manufacturer’s Instructions

Before you start installing your pool cleaner, make sure to locate and read the manufacturer’s instructions carefully. Follow the setup diagrams closely to guarantee proper installation, and always adhere to safety guidelines. Doing so helps prevent damage and keeps you safe throughout the process. Additionally, understanding the basic components of the cleaner can facilitate troubleshooting and maintenance later on. Recognizing how emerging sneaker trends influence design features can also help in understanding the functionality and durability of your equipment.
Locate Model Instructions
Have you located the manufacturer’s instructions for your suction pool cleaner? It’s essential to review these instructions to ensure proper setup and operation. Check the manual for details on model compatibility, as different models may have unique installation requirements. Understanding the various cleaning modes available will help you select the best setting for your pool’s needs. The instructions will also guide you through any specific steps needed to connect hoses, adjust settings, or prepare the cleaner for use. Taking the time to familiarize yourself with the manufacturer’s guidelines guarantees you won’t miss critical safety or performance tips. Clear understanding of your model’s features will make the installation process smoother and help your cleaner operate efficiently. Additionally, understanding electric dirt bikes can help you anticipate potential issues and tailor your maintenance approach accordingly. Being aware of emerging AI automation developments in the industry can also inform better maintenance practices and upgrades.
Follow Setup Diagrams
Since manufacturer’s instructions often include detailed setup diagrams, it’s important to carefully follow these visuals to guarantee correct installation. Accurate adherence ensures your suction pool cleaner functions efficiently and simplifies ongoing pool maintenance. Pay close attention to the diagram’s details, especially connections and pump placements, to avoid common cleaner troubleshooting issues later. Take note of specific instructions for hose length, positioning, and securing fittings, as these directly impact cleaning performance. Proper installation adheres to local building codes and manufacturer guidelines, which helps ensure your cleaner operates smoothly and reliably. Following the manufacturer’s recommended installation procedures can also extend the lifespan of your pool cleaner. Additionally, understanding industry standards can help you identify any discrepancies or issues during installation. Being aware of proper storage of equipment and accessories can prevent damage and ensure readiness for future use. When in doubt, consulting expert advice can further ensure proper setup and optimal operation.
Adhere to Safety Guidelines
Reading the manufacturer’s instructions carefully is essential to guarantee safe and correct installation of your suction pool cleaner. Always follow the guidelines to prevent accidents, especially regarding electrical safety precautions. Be aware of pool chemical safety by handling chemicals properly and avoiding contact with the cleaner’s parts. Before starting, ensure all power sources are turned off to prevent electrical shocks. Use the table below to understand key safety measures:
| Safety Measure | Description |
|---|---|
| Electrical Safety Precautions | Never operate the cleaner with wet hands or while submerged |
| Pool Chemical Safety | Keep chemicals away from electrical components |
| Power Off | Turn off power before maintenance or adjustments |
| Proper Handling | Use gloves when handling chemicals or parts |
| Supervision | Keep children and pets away during installation |
Additionally, hydrocolloid technology in acne patches demonstrates how specific materials can promote healing by drawing out impurities, highlighting the importance of choosing the right materials for safety and effectiveness. Proper attention to safety guidelines plays a crucial role in ensuring a secure installation process. Being aware of cookie categories helps users make informed decisions about their privacy preferences during setup. Furthermore, understanding electrical safety is vital to prevent potential hazards during the installation process.
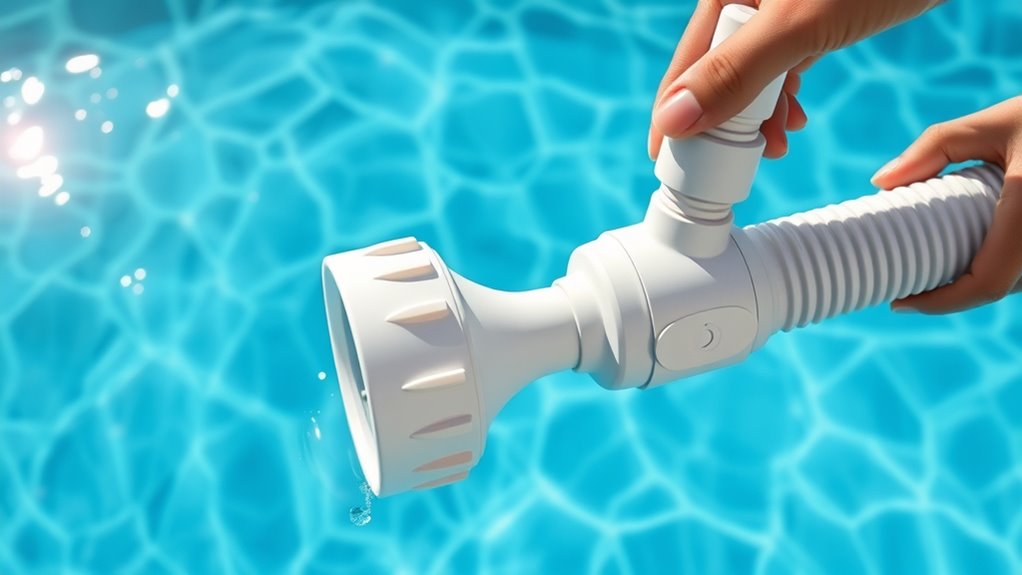
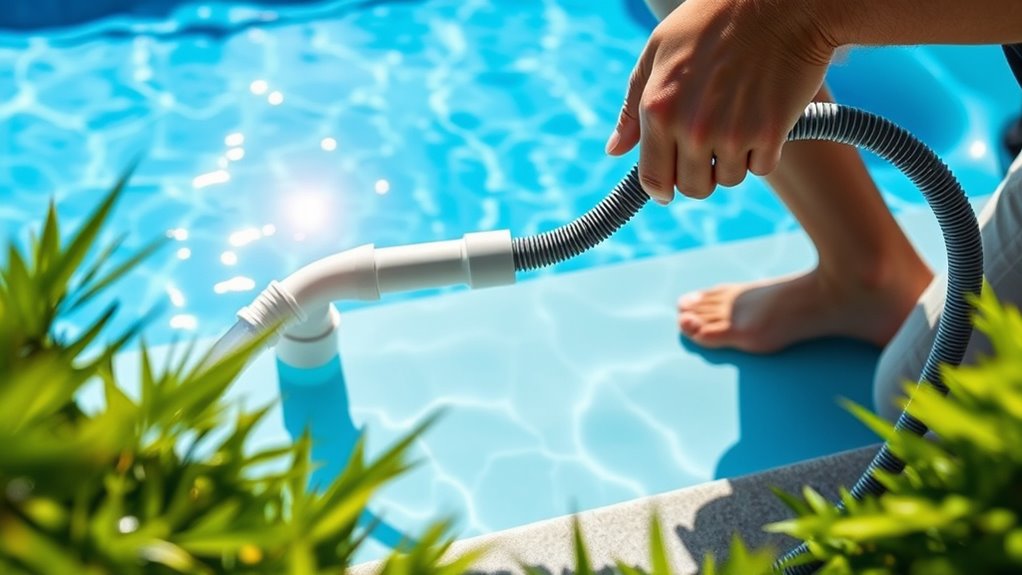
Attach the Hose to the Pool Skimmer or Dedicated Fitting

Next, you need to securely attach the hose to the pool skimmer or dedicated fitting, ensuring a tight connection. Make sure the fitting is positioned correctly to prevent leaks and maintain proper suction. Properly securing the hose helps your cleaner work efficiently without interruptions.
Secure Hose Connection
To guarantee your suction pool cleaner works effectively, you need to securely attach the hose to the pool skimmer or dedicated fitting. Ensure the hose material is flexible yet durable enough to withstand water pressure and pool chemicals. Check the connection types, whether threaded, slip, or clamp-on, to confirm compatibility with your pool’s fittings. A secure connection prevents air leaks and loss of suction, which can reduce cleaning efficiency. Additionally, selecting vetted components ensures reliable performance and longevity of your setup. Being aware of pressure management techniques can help maintain optimal suction and prevent hose damage over time. Properly managing system pressure is essential for sustained operation and effective cleaning results, especially considering relationship dynamics and how they influence overall pool maintenance.
Proper Fitting Placement
Attach the hose securely to the pool skimmer or dedicated fitting, making sure it fits snugly to maintain ideal suction. Use hose accessories like fittings or clamps if needed to guarantee a tight connection. Proper fitting placement is key to achieving effective pool cleaning patterns, so double-check that there are no leaks or gaps. A secure connection prevents loss of suction, helping the cleaner move smoothly across the pool surface. Adjust the hose length so it doesn’t snag or drag, which could disrupt cleaning. Keep the hose free of twists or kinks for maximum operation. When the hose is properly fitted, your cleaner will follow consistent pool cleaning patterns, covering every area efficiently. This step guarantees better performance and prolongs the life of your suction pool cleaner.
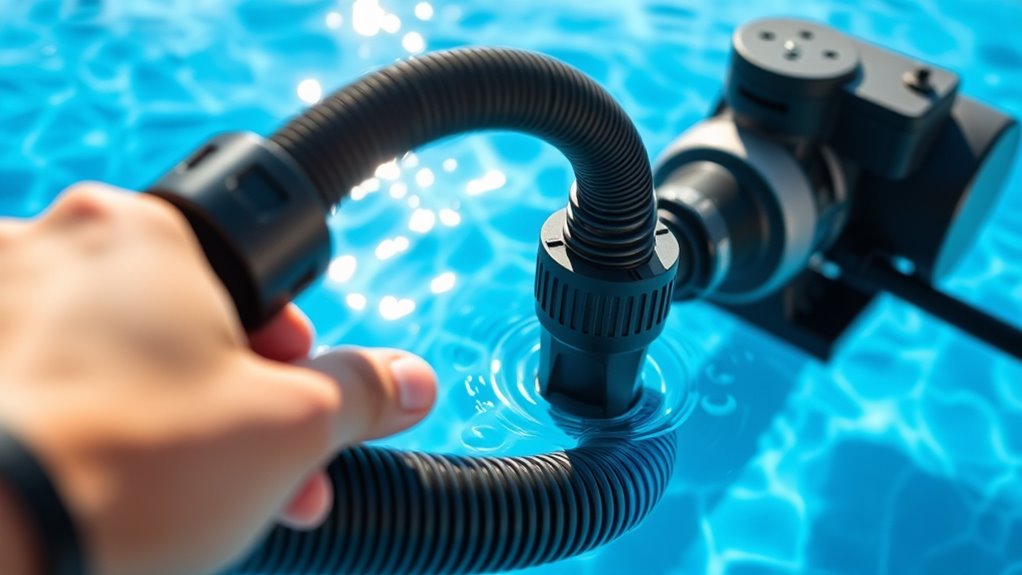
Connect the Hose to the Cleaner Head
Before connecting the hose to the cleaner head, make sure both components are clean and free of debris. Properly attaching the hose guarantees maximum suction and cleaning efficiency. First, check the hose compatibility with your pool cleaner head, as different models may require specific connector types. Confirm that the connector type matches your equipment to prevent leaks or disconnections. When attaching, align the fittings securely and twist until they lock into place. Use the correct connector type to guarantee a snug fit and avoid damage. Consider these points:
Ensure hose and cleaner head are clean, compatible, and securely connected for optimal pool cleaning performance.
- Verify hose compatibility with your pool cleaner head
- Identify the connector types required for your model
- Ensure fittings are tightly secured and locked
- Avoid forcing connections to prevent damage
This careful step guarantees a reliable connection, setting the stage for effective pool cleaning.
Submerge and Arrange the Hose Properly in the Pool

Once the hose is securely connected, gently submerge it into the pool, making certain the entire length is underwater. You want to avoid air pockets that can disrupt water circulation. As you arrange the hose, consider the hose material, which influences flexibility and durability. Proper positioning promotes efficient water flow, preventing tangles or kinks. To help you visualize, here’s a quick guide:
| Hose Material | Flexibility | Durability |
|---|---|---|
| PVC | High | Moderate |
| Reinforced Rubber | Very high | High |
| Vinyl | Moderate | Low |
Arrange the hose so it lays flat and follows the pool’s contours. This setup ensures ideal water circulation, which improves cleaning performance.
Position the Cleaner in the Pool
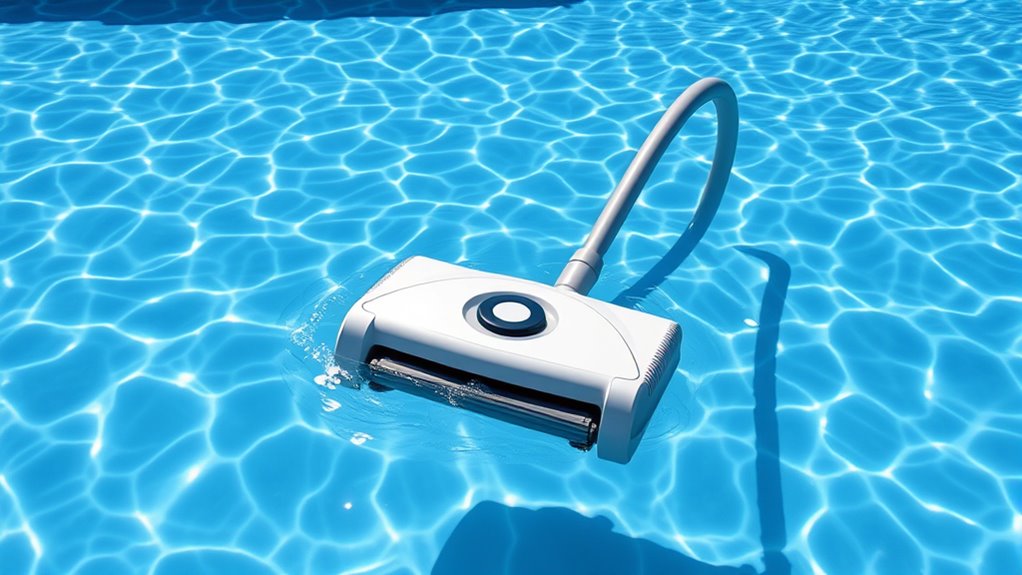
To guarantee your suction pool cleaner operates effectively, you should position it correctly in the pool. Place the cleaner on a flat section of the pool surface, avoiding corners or areas with debris buildup. Ensure the water level is appropriate—about halfway up the skimmer opening—to promote ideal suction. Proper placement helps the cleaner reach all areas and prevents it from getting stuck.
- Position the cleaner away from ladders, steps, or drains
- Keep the hose straight and untangled before attaching
- Place the cleaner on a smooth, even surface for stability
- Confirm the water level is sufficient for proper suction and movement
Turn on the Pool Pump and Check for Proper Operation
Start by turning on your pool pump and observing its operation. Confirm the water flows smoothly through the system and that the suction is steady. Check that the pool chemistry is balanced to prevent issues like algae growth or equipment corrosion, which could affect the cleaner’s performance. To visualize the setup, consider this table:
| Component | Proper Operation Description |
|---|---|
| Pool Pump | Runs quietly with steady flow |
| Water Flow | No leaks or blockages |
| Pool Chemistry | Balanced pH and chlorine levels |
If you notice any irregularities, turn off the pump immediately. Proper operation ensures pool safety and excellent cleaning results, making your maintenance easier and safer.
Adjust the Hose Length and Flow if Needed
After confirming that your pool pump is running smoothly and the water flow is steady, check the hose connection to guarantee it’s the correct length for your pool size and setup. If the hose is too long, it can reduce flow and hinder cleaning efficiency; if too short, it may not reach all areas. Adjust the hose length accordingly, ensuring it’s not taut or slack. For flow adjustment, verify that the cleaner moves smoothly across the surface without stalling or racing. Fine-tune the flow by adjusting the valve or venturi if available. Keep these key points in mind:
- Measure the hose for your pool size before cutting or connecting
- Ensure the hose is neither too tight nor too loose
- Use flow adjustment features to optimize movement
- Test the cleaner’s performance after adjustments
Monitor the Cleaner During Its First Run

Once you’ve turned on your pool pump and activated the cleaner, closely observe its initial movement across the pool surface. Make sure the cleaner moves smoothly without getting stuck or veering off course. Check that the sensor calibration is working correctly; if sensors aren’t calibrated properly, the cleaner might miss spots or bump into walls. Ensure the power supply is stable and providing consistent energy; fluctuations can affect performance. Watch for irregular movements or hesitation, which could indicate issues with the hose or sensor alignment. If needed, pause the cleaner and adjust the hose or check connections. Monitoring during the first run helps you catch problems early, ensuring your suction cleaner operates efficiently and keeps your pool spotless.
Frequently Asked Questions
Can I Install a Suction Pool Cleaner Myself Without Professional Help?
You can definitely try DIY installation of a suction pool cleaner, but it depends on your comfort with pool maintenance. If you’re handy and follow the instructions carefully, you might manage it yourself. However, professional assistance guarantees proper setup, especially if you’re unsure about connections or troubleshooting. Assess your skills first; if needed, don’t hesitate to call in a professional to ensure your cleaner works efficiently and safely.
What Safety Precautions Should I Take During Installation?
When installing a suction pool cleaner, you should prioritize safety by ensuring electrical safety—turn off the power before starting—and handling chemicals carefully to avoid spills or reactions. Wear protective gloves and goggles, and follow manufacturer instructions precisely. Keep the area dry and well-ventilated, and double-check all connections to prevent leaks or electrical hazards. Taking these precautions helps keep you safe throughout the installation process.
How Do I Troubleshoot if the Cleaner Isn’t Moving Properly?
Did you know that improper pool water chemistry can cause suction pool cleaners to malfunction? If your cleaner isn’t moving properly, check for obstructions or tangled hoses. Guarantee your pool cleaning schedule is consistent and that the skimmer and pump baskets are clean. Adjust the cleaner’s float or weight to improve movement. Regularly maintaining water chemistry helps prevent issues, ensuring your cleaner operates smoothly and keeps your pool pristine.
Is It Necessary to Turn off the Pool Pump Before Installation?
For pool pump safety, it’s best to turn off the pump before starting installation. This prevents accidents and ensures the cleaner’s parts are secure. Gather your installation tools, then switch off the pump to avoid water flow and potential injuries. Turning off the pump makes the process safer and easier, giving you peace of mind while you connect the suction pool cleaner properly. Always follow safety guidelines for a smooth setup.
How Often Should I Check the Hose Connections for Leaks?
You should check your hose connections regularly for leaks to guarantee ideal leak prevention. Aim to inspect the hoses at least once a week, especially after storms or heavy usage. During hose inspection, look for cracks, loose fittings, or signs of wear. Promptly tighten or replace any damaged parts. Consistent leak prevention helps your pool cleaner run smoothly, saves water, and prevents unnecessary strain on your pool’s filtration system.
Conclusion
Now that your cleaner is set, watch it glide through your pool like a gentle breeze sweeping across calm waters. With everything in place, you’re ready to enjoy sparkling, debris-free swimming days. Think of your pool as a mirror reflecting your effort and care—each clean surface a clear canvas for relaxation and fun. Keep an eye on it during the first run, and soon, effortless cleanliness will become your new standard.