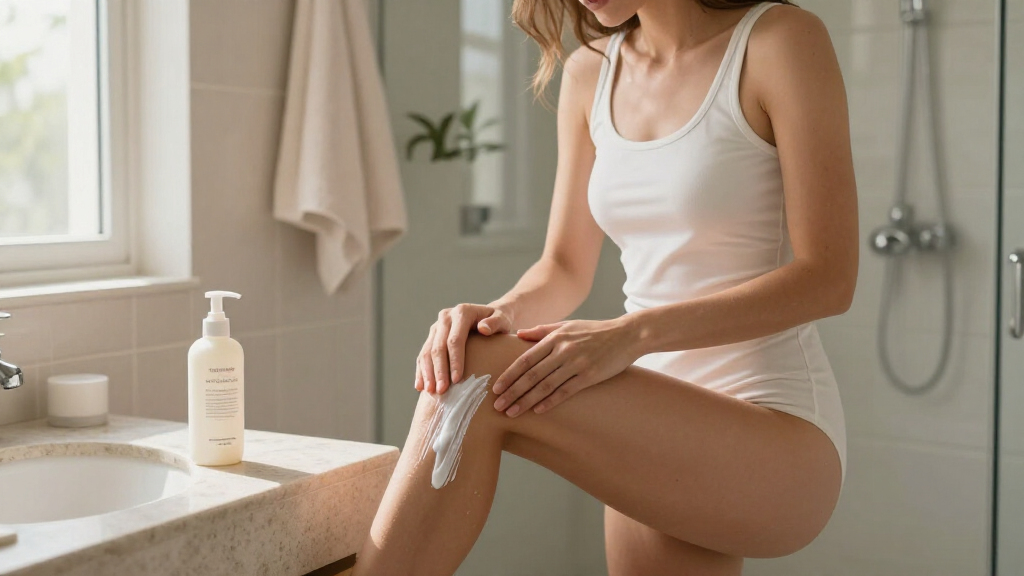

This guide shows beginners how to prepare their skin, apply self-tanning lotion evenly, and care for the developing color. Set aside about 45-75 minutes for preparation and application, then follow the product label for the development time, commonly 6-8 hours. The finished tan should look even, with no missed patches or heavy color around dry areas.

Get beauty and skincare favorites delivered free with Prime
- Fast, free delivery on millions of items
- Prime Video, Amazon Music and more included
- Member-only deals all year

Beauty by Earth Self Tanner
- ✔ Formula: Dye-free self-tanner
- ✔ Shade options: Light and Medium
- ✔ Stated skin-tone range: Fair to olive

Self Tanner Lotion & Mitt Set – USA Made with Natural & Organic Ingredients
- ✔ Product type: Gradual tanning lotion set
- ✔ Origin: USA
- ✔ Ingredient positioning: Natural and organic

Face Tanner – USA Made with Natural & Organic Ingredients, Streak-Free Tan
- ✔ Product type: Face self-tanning lotion
- ✔ Origin: USA
- ✔ Ingredient positioning: Natural and organic
Difficulty: Beginner | Time: 45-75 minutes, plus 6-8 hours for color to develop
What You’ll Need
Tools & Materials:
- Self-tanning lotion in a shade and formula suited to your skin
- Exfoliating cloth or gentle body scrub
- Clean towel
- Moisturizer
- Disposable gloves or a tanning mitt
- Loose, dark clothing
- Mirror and optional hair tie
Knowledge:
- Basic ability to apply and blend lotion over the body
- Willingness to follow the product label for application and development time
Check the product label for directions, warnings, and whether it is intended for the face or body. Self-tanning lotion colors the outer skin; it does not protect against sunburn. Keep using sunscreen when outdoors. If you have sensitive skin or a history of reactions, patch-test the product on a small area according to its instructions before applying it widely.
Beauty by Earth Self Tanner
For shoppers who want one lotion to cover a straightforward body-tanning routine, Beauty by Earth Self Tanner is the most balanced choice in this group. Its dye-free formula is intended to reduce staining on sheets and clothing, while the product is described as producing a natural golden tan without orange undertones or a harsh self-tanner smell. That combination makes it a practical first pick for someone who wants color without adding a strong guide-dye or scent to the routine.The choice of Light and Medium shades gives it a clearer fit across fair-to-olive skin tones than the other two listings, which do not name shade options. It is also described as fading evenly over several days, a useful distinction for buyers who would rather avoid a sharp-looking fade. Compared with the gradual lotion in the mitt set, however, this product does not come with application tools or a stated gradual-build approach, so buyers need to bring their own prep and application routine.There is a caveat behind the reduced-staining positioning: some transfer onto light fabrics may occur during exfoliation. We would not treat “dye-free” as permission to skip ordinary care around pale towels or clothing. The listing also provides limited detail on how quickly color develops or how long to wait before dressing, so buyers seeking a tightly specified routine may prefer the set. Still, its shade choices, body-tanner role, and even-fade claim make it the strongest all-around match here.
Pros:
- Light and Medium shade options are specified.
- Dye-free formula is intended to minimize fabric staining.
- Described as producing a natural golden tan without orange undertones.
- Vegan and cruelty-free, with color said to fade evenly over several days.
Cons:
- Some transfer onto light fabrics may occur during exfoliation.
- No application mitt or exfoliating tool is included in the listed product details.
- The description does not specify development time or a detailed application schedule.
Best for: Buyers seeking a dye-free body tanner with two named shade options and an even-fade claim.
Not ideal for: Shoppers who want application mitts included, need a clearly gradual color-building schedule, or require a product explicitly intended for facial use.
Bottom line: We rank Beauty by Earth first for its useful shade choice and dye-free body-tanning profile, while noting that buyers still need to manage fabric contact and application themselves.
“We rank Beauty by Earth first for its useful shade choice and dye-free body-tanning profile, while noting that buyers still need to manage fabric contact and application themselves.”
Self Tanner Lotion & Mitt Set – USA Made with Natural & Organic Ingredients
The main reason to choose this set over Beauty by Earth is not a claim of stronger color; it is the application kit built around the lotion. It includes an exfoliating mitt, application glove, and face mitt, giving first-time tanners a more complete starting point. For someone who has no tools and wants to think through prep as well as application, that package makes the routine easier to organize than buying a standalone lotion.Its gradual tanning formula is another meaningful difference. Gradual color can suit buyers who prefer to build toward their desired depth rather than commit to a single application, but the tradeoff is time: the product description says multiple applications may be needed. Beauty by Earth is the more direct all-around recommendation if shade selection and a stated even fade matter more; this set makes more sense when guided application and included accessories take priority.The lotion is described as dye-free, toxin-free, non-staining, and designed for a streak-free result, with natural and organic ingredients and USA manufacture. Those are useful claims, but they do not remove the need to apply carefully or establish how the formula will suit every individual. The listing also does not name shade choices, a specific development schedule, or a stated fade pattern. We see it as the most complete at-home starter set, not the clearest choice for anyone who wants a one-step, specified shade match.
Pros:
- Includes an exfoliating mitt, application glove, and face mitt.
- Gradual tanning approach allows color to be built through repeated applications.
- Described as dye-free, non-staining, and streak-free.
- Made in the USA with natural and organic ingredients, according to the listing.
Cons:
- Multiple applications may be required to reach the desired depth.
- No shade options are specified in the supplied details.
- The product description does not provide a detailed development or fade timeline.
Best for: First-time self-tanner buyers who want prep and application tools included with a gradual lotion.
Not ideal for: Shoppers who want a named shade range, faster one-application color, or a product listing with a specific fade and development schedule.
Bottom line: We recommend this set for beginners who value tools and gradual control, but not for buyers who want a named shade or the quickest route to their target color.
“We recommend this set for beginners who value tools and gradual control, but not for buyers who want a named shade or the quickest route to their target color.”
Face Tanner – USA Made with Natural & Organic Ingredients, Streak-Free Tan
Face Tanner serves a narrower purpose than the other two picks: it is the dedicated option for adding a sun-kissed look to the face. Its description emphasizes a hydrating, non-greasy finish and positioning for sensitive skin, making it the most relevant choice when a body lotion feels like the wrong product for facial use. Compared with the lotion-and-mitt set, it is a focused formula rather than a complete tanning routine; compared with Beauty by Earth, its advantage is the stated facial application and finish, not a broader shade range.The product is described as USA-made with natural and organic ingredients, and as streak-free with no orange tones or tanner smell. Those claims address common concerns around facial tanning, where uneven application or a heavy-feeling finish can be especially noticeable. Still, the supplied details do not name shade options, explain how to build color, or specify how long the result lasts. We would choose it for its intended use and texture profile, not on the assumption that it offers more color control than the body-focused products.Its main limitation is also its clearest boundary: this is the face specialist, not the best single lotion for someone seeking head-to-toe coverage. Buyers looking for included mitts should consider the set, while anyone who wants explicit Light and Medium choices has a clearer match in Beauty by Earth. The listing does not provide specific drawbacks, so we avoid treating that absence as proof of no tradeoffs; the missing shade and timing details remain practical questions to resolve before choosing.
Pros:
- Specifically positioned as a facial self-tanning lotion.
- Described as hydrating and non-greasy.
- Streak-free finish and sensitive-skin positioning are stated.
- Made in the USA with natural and organic ingredients, according to the listing.
Cons:
- No shade options are specified in the supplied details.
- The description does not state a development time or how long color lasts.
- Its face-focused role makes it a less suitable single-product choice for full-body tanning.
Best for: Buyers looking specifically for a hydrating, non-greasy self-tanning lotion intended for the face, including those who prioritize sensitive-skin positioning.
Not ideal for: Shoppers seeking a full-body tanner, included application tools, or a stated shade range and color-development schedule.
Bottom line: We would choose Face Tanner for its dedicated facial use and lightweight finish, while keeping Beauty by Earth or the mitt set in consideration for body tanning.
“We would choose Face Tanner for its dedicated facial use and lightweight finish, while keeping Beauty by Earth or the mitt set in consideration for body tanning.”
As an Amazon Associate we earn from qualifying purchases.
Before You Start
Plan to apply the lotion when you can leave it on without showering, sweating heavily, or getting wet during the stated development period. If you shave or wax, do so ahead of application rather than immediately beforehand, since freshly shaved skin can be more prone to irritation. Do not apply over broken, irritated, or inflamed skin. Wash your hands after preparation, and protect clothing, towels, and bedding from transfer while the lotion is wet.
Step-by-Step Instructions
Step 1: Read the product directions
Check the label for where the lotion can be used, how much to apply, whether it needs rinsing, and how long the color takes to develop. Confirm whether the formula is tinted for immediate guidance or clear while it develops. Use a separate face product if the label does not say the body lotion is suitable for facial skin.
Tip: Follow the product’s timing and application directions if they differ from the general guidance here. Do not combine products unless their labels say they can be used together.
Check: You know which areas the product is intended for and when you can shower or dress normally.
Step 2: Exfoliate and remove residue
Exfoliate your body gently, paying attention to knees, elbows, ankles, and heels, where dry skin can hold more color. Rinse away scrub and any soap, then dry completely with a clean towel. Avoid harsh scrubbing, which can leave skin irritated or patchy.
Tip: If you exfoliate or shave, give your skin time to settle before tanning, especially if it becomes red or sensitive. Do not apply lotion to damp skin unless the product directions permit it.
Check: Your skin feels clean and dry, without visible flakes, oil, or product residue.
Step 3: Moisturize dry areas lightly
Apply a thin layer of plain moisturizer to dry patches, especially knees, elbows, ankles, heels, and knuckles. Let it absorb before applying self-tanner. Avoid coating your whole body in a thick layer; a heavy barrier can make the color develop unevenly.
Tip: Use less moisturizer than you would for everyday skincare. The aim is to soften rough areas, not leave a slippery film.
Check: Dry patches feel softened, and your skin no longer feels wet or greasy.
Step 4: Set up your application area
Choose a well-lit space with a mirror, and tie back long hair. Put on disposable gloves or a clean tanning mitt. Keep a towel nearby for spills, and have loose, dark clothing ready for after application. If you are using a tinted lotion, protect surfaces and fabrics from transfer.
Tip: Apply the lotion in a room where you can move comfortably and reach your back. Ask someone to help with areas you cannot reach evenly, or use a long-handled applicator if available.
Check: Your tools and clothing are within reach, and you can see the areas you are treating.
Step 5: Apply lotion to larger areas first
Dispense a modest amount onto the mitt, then spread it over one section at a time using smooth, overlapping strokes. Work from your legs upward, followed by your torso and arms, or use another consistent order that lets you track covered areas. Add small amounts as needed rather than applying a thick layer at once. Blend each section into the next while the lotion is still workable.
Tip: Use long, light strokes and avoid repeatedly rubbing the same spot after the lotion begins to set. Check the product label for any instruction to apply to dry or damp skin.
Check: The lotion is spread in a thin, even layer, with no obvious uncovered strips or thick wet patches.
Step 6: Blend joints, hands, feet, and edges
Use the leftover lotion on the mitt for knees, elbows, ankles, and the backs of your hands and feet. Bend your knees and elbows while blending so creases are covered lightly. Sweep around wrists and ankles to soften the edges. If the mitt has too much product, use a clean, dry area of it to remove excess from joints and creases.
Tip: Avoid putting a full fresh pump of lotion directly on hands, feet, knees, or elbows. These areas often develop darker than surrounding skin.
Check: There are no sharp lines at wrists or ankles, and joints and creases have only a light, blended coating.
Step 7: Treat the face and hard-to-reach areas
If the product is labeled for facial use, apply a small amount with clean hands or a separate mitt, blending along the hairline, jaw, and sides of the face. Keep lotion away from eyes, lips, nostrils, and eyebrows. Use a mirror or ask for help with your back, and blend carefully around the neck so it does not form a visible line.
Tip: Wash your hands promptly if you applied any lotion without gloves. Do not apply tanning lotion to the eye area or to skin the product label excludes.
Check: The face and neck connect smoothly in color, with no visible product in the hairline or brows.
Step 8: Let the color develop without disturbance
Wait for the lotion to dry according to its label before dressing. Put on loose, dark clothing and avoid tight straps, sweating, water, or skin-to-skin contact that could rub the product off during development. Keep the product on for the stated time, then rinse only if the directions call for it. Do not judge the final shade while guide color is still present or before the color has developed.
Tip: Development times vary by formula. A tinted guide color may wash off while the developed tan remains, so follow the label rather than trying to preserve the visible tint.
Check: The lotion has had the full label-directed development time, and you have rinsed or showered only as directed.
Step 9: Inspect the result and wash your hands
After the development period and any directed rinse, inspect your skin in natural or bright, even light. Look at the backs of hands, feet, ankles, knees, elbows, and the hairline. Wash your hands thoroughly if you have not already done so, including between fingers and around nails. If a small area is missed, wait until the skin is dry and follow the product directions before correcting it with a small amount.
Tip: Avoid adding extra lotion everywhere to fix one pale patch. A small, targeted correction is less likely to make the surrounding area too dark.
Check: The color appears reasonably even, with no untreated bands, dark creases, or obvious transfer marks.
Common Mistakes to Avoid
- Applying lotion to dry, rough skin without preparation, which can leave dark patches. — Exfoliate gently beforehand and apply a small amount of moisturizer to dry areas, allowing it to absorb before tanning.
- Using too much lotion on hands, feet, knees, or elbows. — Blend these areas with leftover product on the mitt and remove excess from creases before it dries.
- Showering, sweating, or wearing tight clothing during development. — Choose a time when you can stay dry and wear loose clothing for the full period stated on the label.
- Applying a body formula to the face or irritated skin without checking the label. — Use the product only on approved areas, patch-test if you are sensitive, and avoid broken or inflamed skin.
Troubleshooting
Problem: The tan looks streaky after it develops.
Solution: Do not scrub aggressively or apply another full layer right away. Let the color settle, then use gentle exfoliation as tolerated to soften uneven areas. For a small pale stripe, apply a small amount of product to that area only, following the label.
Problem: Hands, feet, knees, or elbows look too dark.
Solution: Wash any still-wet excess promptly. If the color has developed, gently exfoliate the area and moisturize; avoid harsh scrubbing that can irritate skin. Use less product on those areas during the next application.
Problem: The lotion transfers onto clothing or bedding.
Solution: While product is still wet, follow the label’s cleanup directions and avoid rubbing the stain deeper into fabric. During development, wear loose, dark clothing and wait until the lotion is dry before dressing.
Problem: Your skin becomes itchy, burning, or significantly irritated.
Solution: Stop using the product and rinse it off if the label permits. Do not reapply to irritated skin. Seek medical advice for persistent or severe symptoms, swelling, or breathing difficulty.
What Success Looks Like
The application is successful when the developed color looks even across the treated areas, with softly blended boundaries and no heavy buildup on joints, hands, or feet. Skin should not feel persistently irritated. The lotion should have been left on and rinsed according to its label, and the finished color should not be treated as sun protection.
Next Steps
Maintain the color by moisturizing regularly and using gentle cleansing; avoid rough exfoliation while you want the tan to last. Wash your mitt after use according to its care instructions and let it dry fully. When the color fades, exfoliate gently and reapply only as directed by the product label. Continue applying broad-spectrum sunscreen when exposed to sunlight, since self-tanner does not prevent sunburn.
Frequently Asked Questions
How long should self-tanning lotion stay on?
Use the development time on the specific product label. Formulas vary, and some require a rinse after a set period while others have different instructions. Do not assume that a darker guide color means the tan has finished developing.
Can I apply self-tanning lotion to my face?
Only use it on your face if the label says it is suitable for facial skin. Apply a small amount, avoid the eyes and lips, and blend carefully along the hairline and jaw. A product formulated for the face can be easier to control.
Should I moisturize before applying self-tanner?
Moisturize dry areas lightly, such as elbows, knees, ankles, and hands, and let the moisturizer absorb first. A thick layer over the whole body can interfere with an even application.
Can I go outside after applying self-tanner?
You can go outside if the product directions allow it, but the lotion does not protect against ultraviolet rays. Follow the label during development and use sunscreen when outdoors, even if your skin looks tanned.
When can I apply another coat?
Wait until the first application has completed its development period and follow the product’s reapplication guidance. Check the color in good light before adding more. Applying extra lotion too soon can make the result darker or less even than intended.
Halloween Picks
halloween
As an affiliate, we earn on qualifying purchases.