To get an even, natural tan across your face, hands, feet, and body, you need to customize your approach for each area. Exfoliate thoroughly, moisturize dry patches, and use precise tools like mitts or brushes. Apply thin layers, blending well on tricky spots like elbows and ankles. For a flawless finish, follow specific tips for each part and maintain proper aftercare. Keep going to discover all the technique secrets for perfecting your tan.
Key Takeaways
- Use specialized products like serums or mousses for facial tanning to ensure natural, even results and avoid irritation.
- Exfoliate and moisturize dry areas such as elbows, knees, hands, and feet before application to prevent patchiness.
- Apply a thin, even layer of tanner on hands and feet, blending carefully to avoid heavy lines or streaks.
- Focus on long, sweeping motions for larger areas like arms and legs to achieve a seamless, natural tan.
- Post-tan, moisturize regularly and avoid harsh cleansers to maintain an even, long-lasting color on all body parts.

Jergens Natural Glow Instant Sun Body Mousse, Self Tanner for Light Bronze Tan, Sunless Tanning Body Bronzer for Natural Looking Color Instantly, 6 Fl Oz
- Flawless Self Tanner: Creates a quick, natural-looking tan
- Deep Sunless Tanning: Lightweight mousse mimics sun results
- Natural Body Bronzer: Instant tone development, deepens over hours
As an affiliate, we earn on qualifying purchases.
As an affiliate, we earn on qualifying purchases.
Preparing Your Skin for Tanning

Preparing your skin properly is essential for achieving an even, long-lasting tan. Start by exfoliating 24 to 48 hours before tanning to remove dead skin cells. Use a loofah, brush, or bath puff, focusing on dry areas like elbows and knees. This helps prevent patchiness and uneven color. Make sure your skin is free of oils and lotions before applying any tanning product, as these can interfere with absorption. Moisturize consistently in the days leading up to tanning, especially dry spots, but avoid applying oils immediately before tanning to prevent patchiness. If you shave or wax, do so at least a week prior to give your pores time to close. Proper preparation guarantees your skin is smooth, clean, and ready to develop a beautiful, even tan. Additionally, using professional-grade tanning products can enhance the longevity and natural appearance of your tan. To further support your tanning process, maintaining moisture balance in your skin helps achieve a more even and natural glow. Incorporating consulting services from professionals can provide personalized tips to optimize your tanning results. Moreover, understanding Glycolic Acid benefits can help improve your skin’s overall texture and readiness for tanning, leading to a more uniform color. Furthermore, being aware of AI safety measures can help in the development of safer tanning technologies and products.
Choosing the Right Products for Your Face

Choosing the right facial tanning products depends on your skin type, desired results, and application preferences. Self-tanning serums are great if you want a gradual, natural glow with skincare benefits like niacinamide and hyaluronic acid, perfect for sensitive or mature skin. Mousses dry quickly and are easy to control for custom depth, ideal if you prefer quick application. Mists provide even coverage and are fast-drying, suited for those who want a light, subtle tan, but watch for strong odors. Illuminating drops blend seamlessly with moisturizers or foundations, offering buildable warmth. Gradual lotions hydrate and deliver streak-free results, great for maintenance. Always consider your skin’s needs—hydration, sensitivity, or oiliness—to pick a product that enhances your natural beauty while delivering a safe, even tan. Additionally, understanding your personality traits can help you choose products that match your lifestyle and preferences. Being aware of the credit card insights can also help you make informed decisions about spending and product purchases, ensuring your skincare routine aligns with your financial goals. Moreover, staying informed about AI-driven product recommendations can help you select the most suitable options based on your preferences and needs. For example, choosing products with ingredients suitable for sensitive skin can improve your overall tanning experience and reduce the risk of irritation. Considering skincare compatibility can further enhance your results and prevent potential adverse reactions.
Achieving a Natural Look on Facial Skin

To achieve a natural-looking tan on your facial skin, start by exfoliating to remove dead cells and create a smooth surface for even application. Follow up with a lightweight moisturizer to hydrate your skin, helping the tan develop evenly and preventing patchiness. Avoid heavy creams before applying tanning products, as they can cause uneven pigment distribution. Always patch-test new products on your jawline or neck to check for sensitivity. Thoroughly cleanse your face beforehand to eliminate oils and residue that could interfere with the tan. Use a mitt or clean hands to apply in gentle circular motions, blending into your hairline and jawline to avoid harsh lines. Layer thin coats, waiting at least 20 minutes before touching your face or applying other products. Incorporating protective skincare practices can also help maintain an even and healthy tan, and using appropriate application tools can ensure a more flawless finish. Implementing skin prep techniques such as gentle cleansing or targeted exfoliation can further enhance the results. Additionally, practicing self-care routines like proper hydration and proper sleep can support healthier skin, leading to more natural-looking tanning outcomes. Engaging in sound healing science techniques such as calming music or sound vibrations can create a relaxing environment during your skincare routine, enhancing overall self-care.
Tanning Techniques for Hands and Fingers
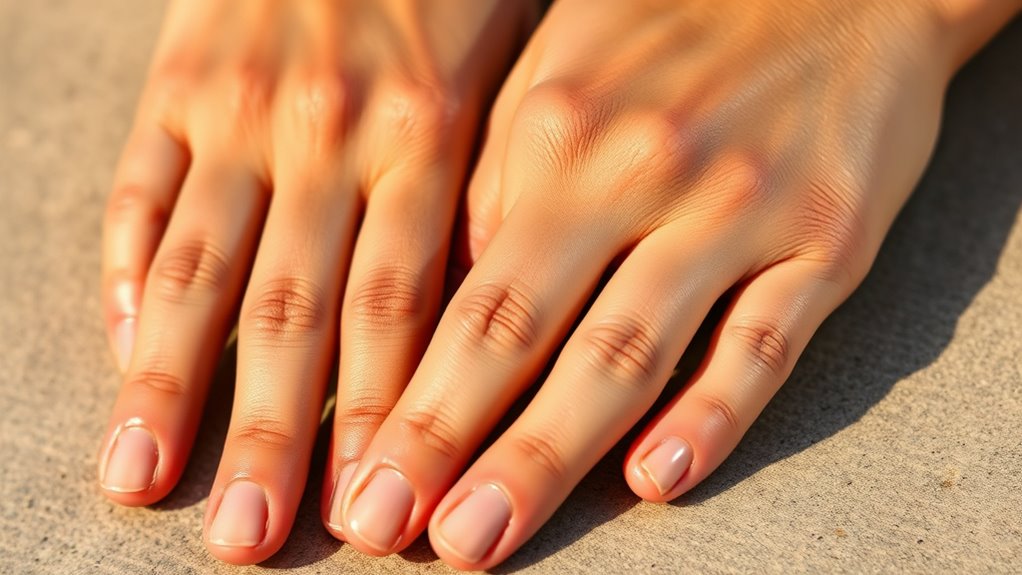
Achieving an even, natural-looking tan on your hands and fingers requires careful application and technique. Start by exfoliating with gloves or a soft brush, focusing on dry areas like knuckles and backs of hands to create a smooth surface. Hydrate your skin with a light moisturizer, applying thicker cream on drier spots to prevent uneven absorption. Use a small amount of tanning mousse or foam, and a precise brush to apply, “clawing” your fingers to ensure full coverage in creases. Blend thoroughly along sides and around edges, avoiding heavy layers that cause streaks or patches. Lightly brush over your nails and wipe off excess to prevent staining. Proper preparation and consistent application can help prevent uneven tanning and achieve a flawless finish. Incorporating a proper technique can further enhance your results. Ensuring adequate drying time allows the tan to set properly and reduces the risk of smudging. Additionally, understanding home tanning technology can help you select products that provide more even and natural results. Let the tan develop for 4-6 hours before rinsing with lukewarm water, then moisturize to maintain a natural glow.
Caring for Feet and Ankles During Tanning

Proper care of your feet and ankles during tanning helps guarantee an even, natural-looking result. Start by exfoliating these areas thoroughly with mitts or gloves in circular motions to remove dead skin. Avoid thick skin spots like heels to prevent patchiness, and hydrate dry areas with a lightweight moisturizer beforehand to prevent over-absorption. Remove jewelry and clean under your toenails to avoid staining and missed spots. Test your tanner on your ankle first to check for discoloration or irritation. Use leftover product on your mitt for blending and apply in circular motions to guarantee full coverage, especially around ankles and between toes. Blend upward with light pressure, sweeping from feet to legs for seamless transitions. proper exfoliation techniques can further enhance the evenness of your tan. Incorporating skin preparation methods such as moisturizing and exfoliating can optimize your tanning results. Additionally, taking steps to maintain skin health during tanning can improve overall appearance and comfort. Ensuring your skin is well-hydrated can also aid in achieving a smoother, more even tan. For optimal results, consider using a professional spray tan to achieve a more even and long-lasting appearance. Wait a couple of minutes before dressing to prevent smudging and ensure an even tan.
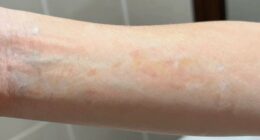
Best Practices for Tanning Arms and Elbows

Exfoliating your arms and elbows thoroughly before tanning guarantees a smooth, even application by removing dead skin cells that can cause streaks. Apply a lightweight moisturizer to elbows and wrists 10-15 minutes beforehand to prevent over-absorption. During application, bend your elbows to stretch the skin and access creases easily. Use circular motions with a mitt to cover the entire arm surface evenly, avoiding reapplying tanner to the elbows after the initial pass to prevent dark patches. Opt for mousse formulas for quick, streak-free results, and choose a mitt over sprays for precise coverage on elbows. Select products with guide colors to visualize application. Limit product on elbows to half the amount used on the rest of your arm for a natural look.
Applying Self-Tanner on Legs and Knees

To guarantee an even, natural-looking tan on your legs and knees, it’s essential to prepare your skin properly before applying self-tanner. Exfoliate your legs a day beforehand to remove dead skin, which helps create a smooth surface. Moisturize dry areas like knees and ankles to prevent over-absorption and uneven color. Use a tanning mitt or latex gloves to apply the product evenly, dividing your legs into sections for better control. Focus on long, sweeping motions and blend well around joints, especially knees, to avoid harsh lines. For knees, apply a light moisturizer beforehand and use a feathering technique for seamless blending. Quickly wipe off any excess with a towel to prevent buildup. Proper preparation and careful application ensure a flawless, streak-free tan on your legs and knees.
Tips for Maintaining an Even Tan on Different Areas

Maintaining an even tan across different body areas requires ongoing attention to your skincare routine and application techniques. Start by exfoliating thoroughly 24 hours before tanning, focusing on rough patches like elbows, knees, and knuckles to prevent uneven color. Moisturize dry or rough spots, such as hands, feet, and elbows, a day before application to avoid dark spots. When applying self-tanner, use a mitt for smooth, even coverage and blend well around joints. For smaller areas like hands and feet, use a brush and mix tanner with moisturizer for a lighter look. Afterward, let the tan dry completely before dressing in loose, dark clothing. Regular moisturizing helps prevent dry patches and promotes uniform fading, keeping your tan looking fresh and even.
Post-Tanning Care to Extend Results

Proper post-tanning care is essential for extending your tan’s vibrancy and preventing premature fading. Start by moisturizing twice daily with fragrance-free lotions containing hyaluronic acid or shea butter to lock in hydration and soothe your skin. For dry areas like elbows, knees, and hands, use lightweight, non-comedogenic products to maintain moisture. Applying aloe vera or cooling gels immediately after tanning helps reduce heat and inflammation. Drink plenty of water to support internal hydration and skin elasticity. Use tan extenders with vitamins A, C, and E to boost skin repair and prolong color. Avoid harsh cleansers and exfoliation for 24-48 hours, and wear loose clothing to prevent friction. These steps help preserve your glow and maximize your tanning results.
Frequently Asked Questions
How Often Should I Reapply Self-Tanner to Maintain My Glow?
You should reapply your self-tanner every 3 to 7 days to maintain your glow. If you want a consistent bronzed look, reapply every 3-5 days, especially with standard formulas. For a more subtle, gradual tan, consider daily application or touch-ups with tanning drops. Keep your skin moisturized and exfoliated to extend the tan’s life. Adjust reapplication frequency based on how quickly your tan fades and your desired intensity.
Can I Use the Same Product for Face and Body?
You might wonder if you can use the same self-tanner on your face and body. While some multi-use products exist, it’s best to avoid doing so. Body formulas can be too harsh or thick for facial skin, risking irritation or uneven color. For safe, natural results, use dedicated facial tanners with gentle ingredients, and reserve body products for larger areas. Patch-test first if you decide to try cross-application.
What Should I Do if I Develop Streaks or Uneven Color?
If you notice streaks or uneven color, start by gently exfoliating the area with a scrub or glove to remove excess tan. Apply a lemon and baking soda paste to lighten darker patches, then rinse thoroughly. Keep skin moisturized, especially on dry spots, before applying any tanning products again. Always guarantee you rinse completely after tanning, and avoid overapplying to prevent future streaks.
Are There Specific Tips for Tanning Sensitive or Acne-Prone Skin?
To tan sensitive or acne-prone skin, you should choose products formulated for delicate skin, like hypoallergenic, fragrance-free, natural options, and avoid irritants. Always prep your skin by gentle exfoliation, moisturizing, and applying SPF. Consider spray tans or gradual tanning to reduce risk. During and after tanning, use oil-free, non-comedogenic products, stay hydrated, and monitor your skin for reactions, consulting a dermatologist if needed.
How Do I Remove Excess or Unwanted Tan From Specific Areas?
To remove excess or unwanted tan from specific areas, you should exfoliate gently with natural scrubs like sugar or oats mixed with yogurt, avoiding harsh abrasives. Applying DIY remedies such as lemon juice or cucumber can lighten the tan. Consistently moisturize afterward and use sunscreen to prevent re-tanning. For stubborn areas, consider professional treatments like IPL or laser toning for more effective results with minimal discomfort.
Conclusion
Remember, your skin is a canvas, and every part deserves care and attention. By tailoring your tanning routine to each area, you create a masterpiece of natural beauty. Think of your tan as a story told through your glow—each section adding a chapter of confidence. With patience and proper care, you’ll reveal a radiant, even finish that’s truly a reflection of your effort. Your perfect tan awaits—paint it with love.